GD&T Tip: Turning Plus/Minus To Profile Tolerance

In the realm of precision machining, even minor ambiguities in design can lead to significant quality and functionality risks. This GD&T tip demonstrates how a seemingly straightforward plus/minus tolerancing scheme can mask potential problems, and how a well-implemented profile tolerance, aligned with ISO GPS and ASME GD&T standards, safeguards both product function and manufacturing efficiency.

Original drawing

While quoting the following part, we found that the customer drawing is ambiguous and parts produced to specification may not meet the customer’s design intent. Original drawing is seen in figure 1.
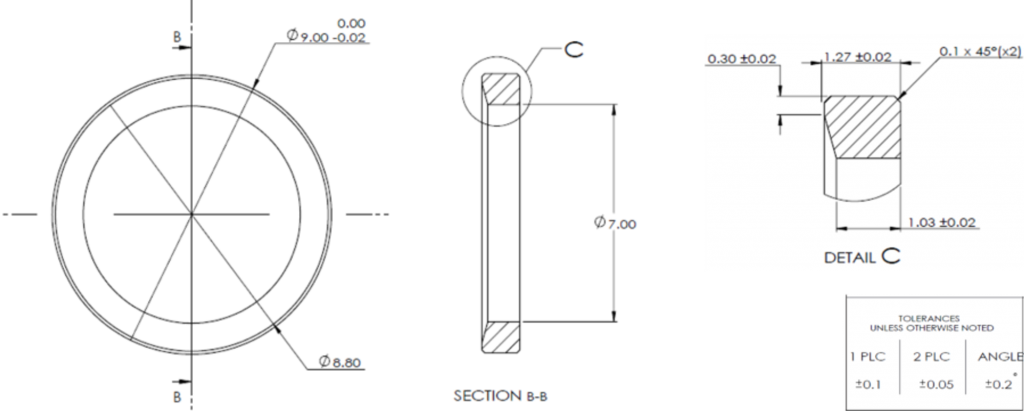
Original drawing showing the part with  plus/minus tolerance

Possible interpretation

Since the drawing is a Plus\Minus drawing:

  • It is impossible to tell the primary features of the part (what feature dictates the primary directions)
  • The conic surface is indirectly toleranced, which may yield to a situation where parts that pass geometric verification may not be functional.

Figure 2 shows a possible interpretation of variation limits. A part that will be within these boundaries will pass geometric inspection, and be at functional risk. the conic taper appears to be a critical feature

Drawing showing the possible interpretation of the original drawing
Figure 2

Functional constraints

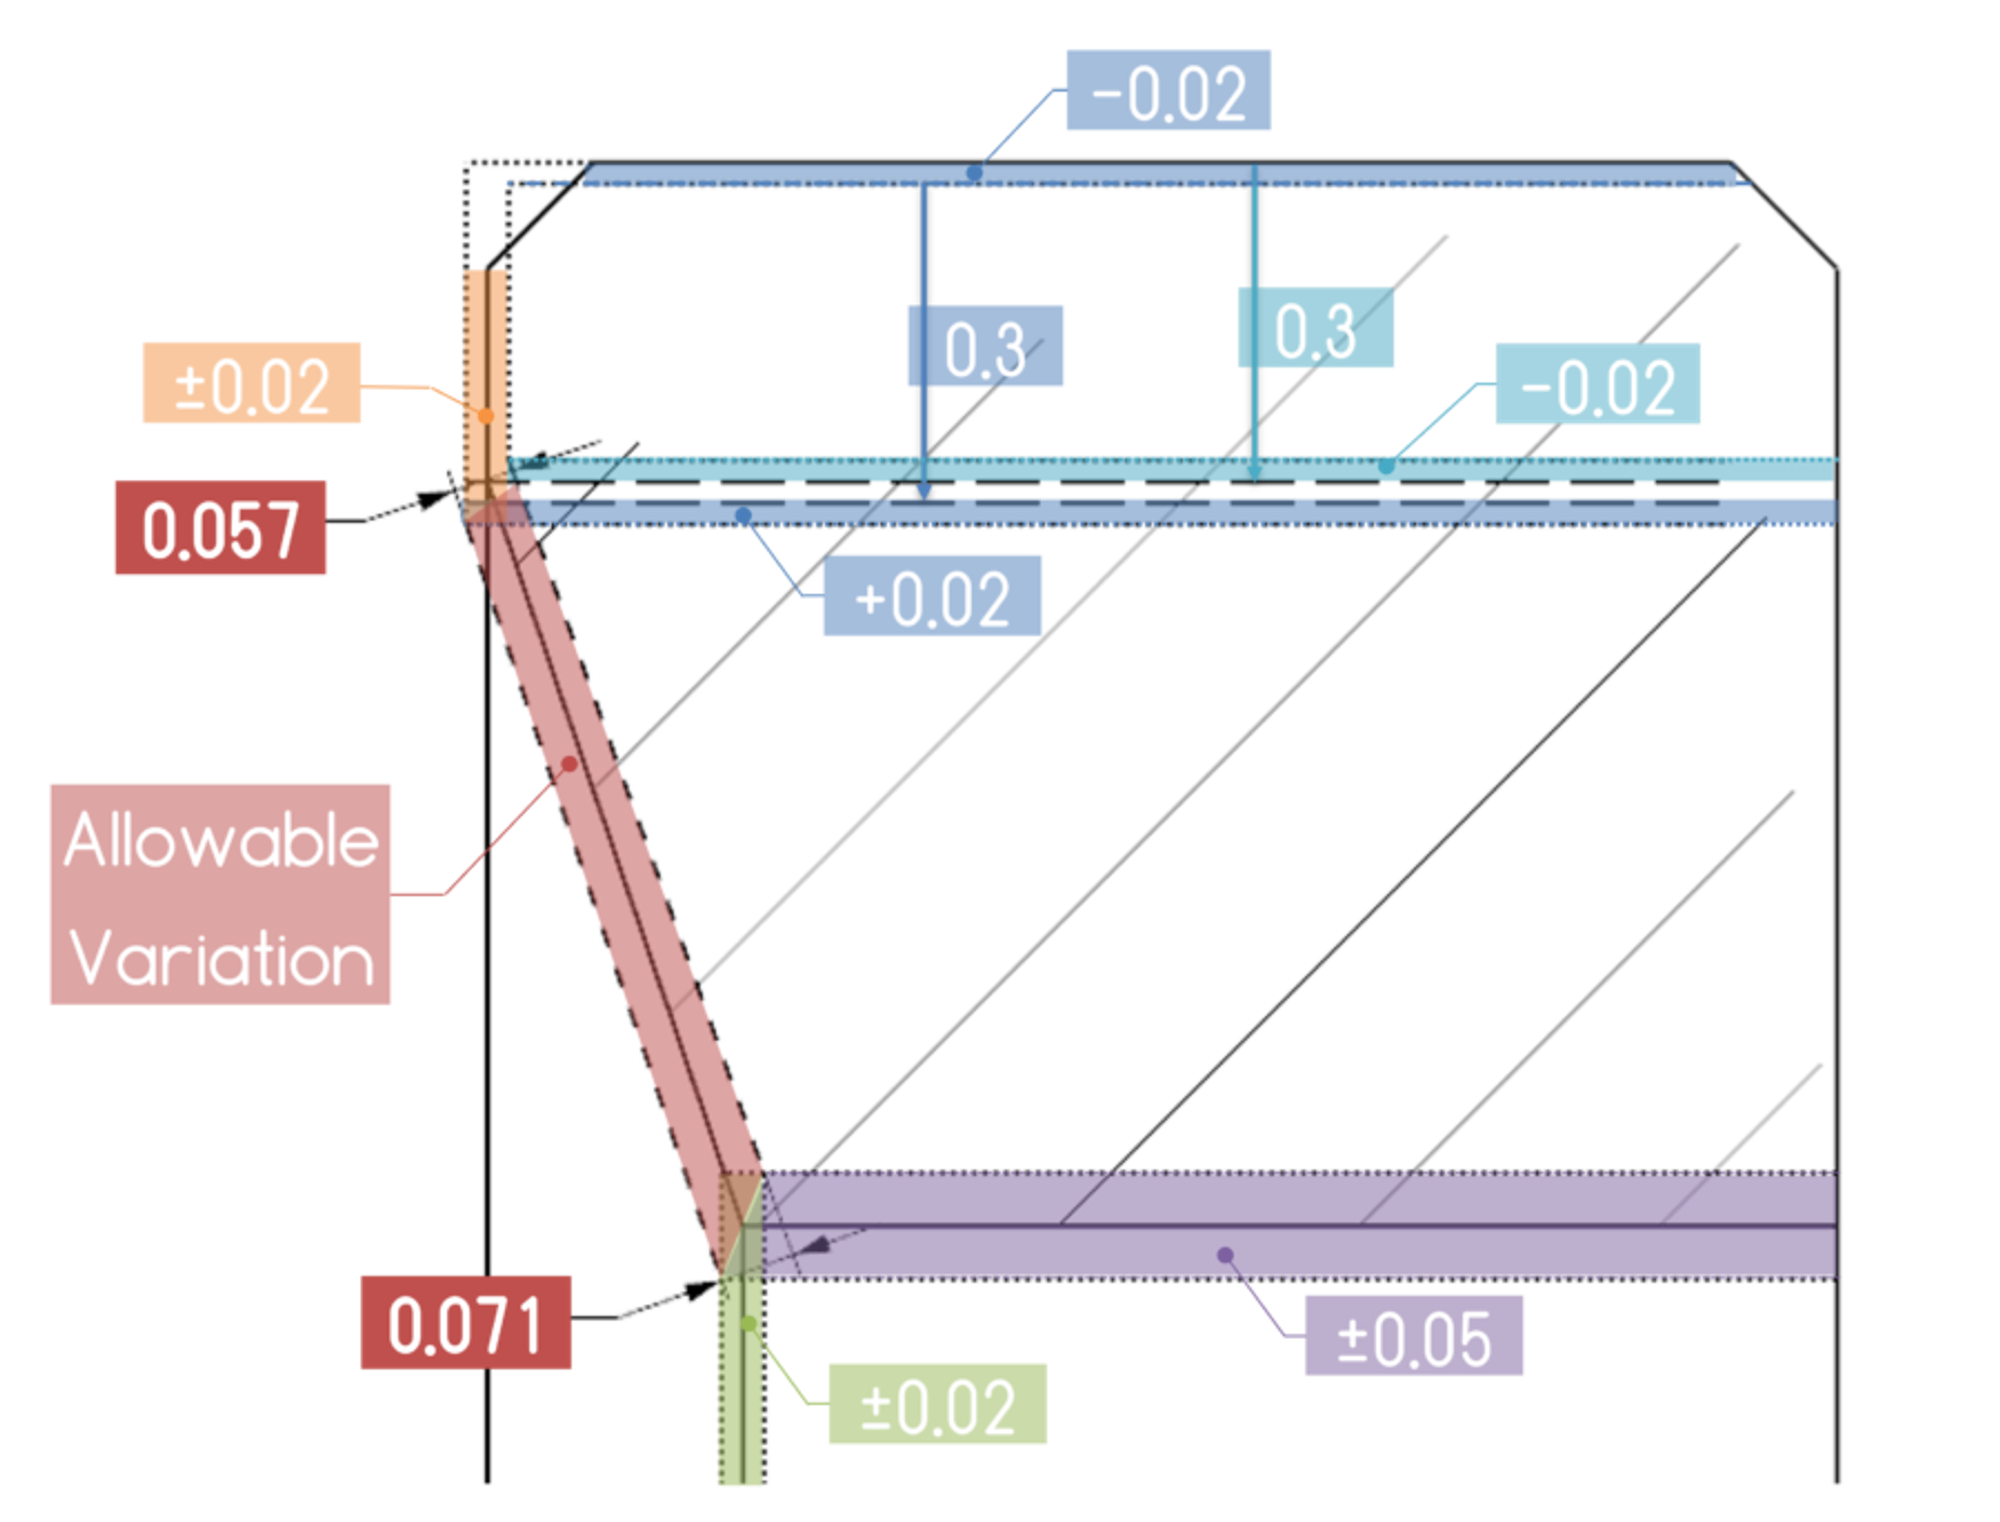
A request for clarification from the customer brought up the functional constraints documented in Figure 3:

  • The part lies tangent to an opposite planar surface (marked in purple)
  • The part is centered by the outer cylindrical diameter 9 (the axis line of the orange surface)
  • Original drawing no direct specification to the conic surface (the area marked in red in Figure 3 between marker A and marker B), the conic and flat are critical features of the part
  • The red area should not exceed a symmetrical offset of 0.015mm (In the original drawing, this area could reach the limits of 0.057 – 0.071).
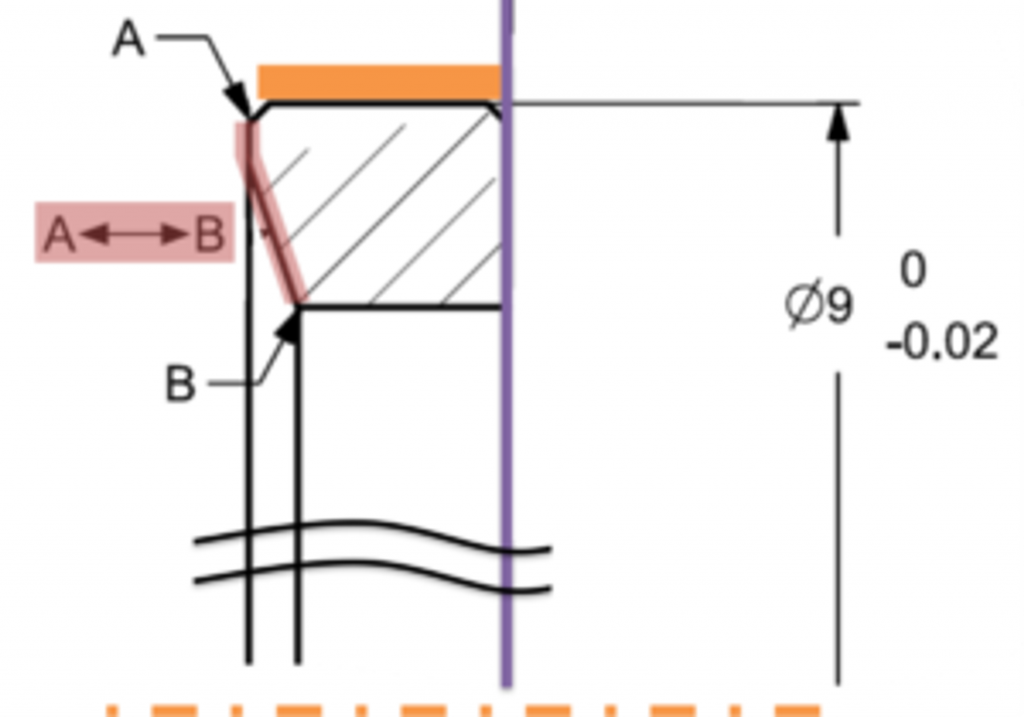
Drawing showing the functional constraints
Figure 3

Correct GD&T implementation using profile tolerance

Considering this, Machinx’s recommendation (Figure 4) was to update the drawing,

  • Specify purple and orange surfaces as datum features.
  • Add direct specification to the critical surface (red) with a profile (instead of plus minus).

(Profile directly specifies a zone that limits size, position, position, and shape variation of the critical features (marked by the red zone in figure 4, and is simpler to control)
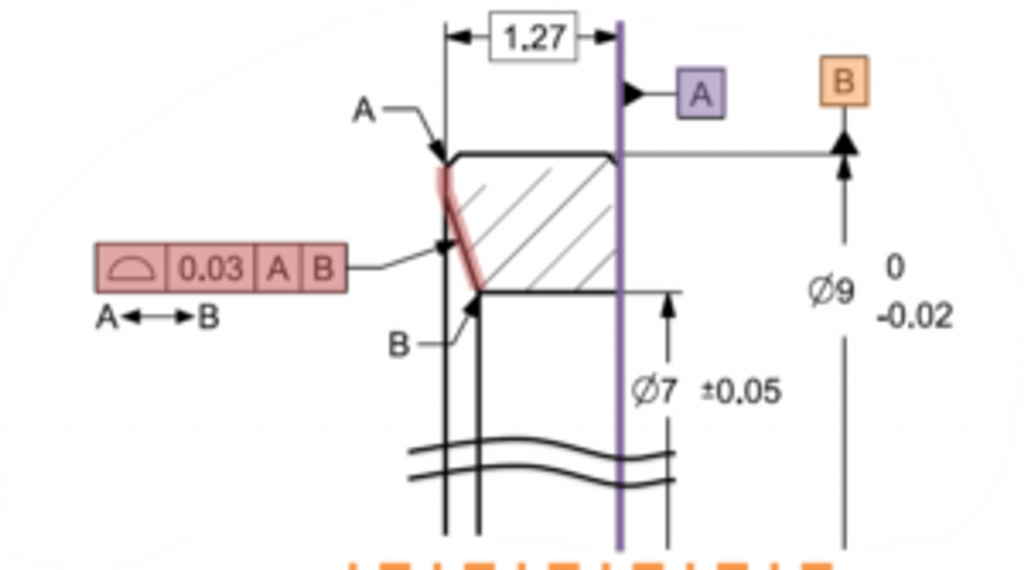
Drawing showing the correct GD&T implementation
Figure 4

A better way to communicate technical feedback

Machinix’s digital platform streamlines the quoting and ordering process of precision machining parts. Using its technical feedback feature it facilitates clear communication between engineers and Machinix technical solutions team. It ensures that any technical issues, including correct implementation of GD&T, are promptly addressed and resolved before production begins. This proactive approach minimizes risks and guarantees a smooth manufacturing experience.
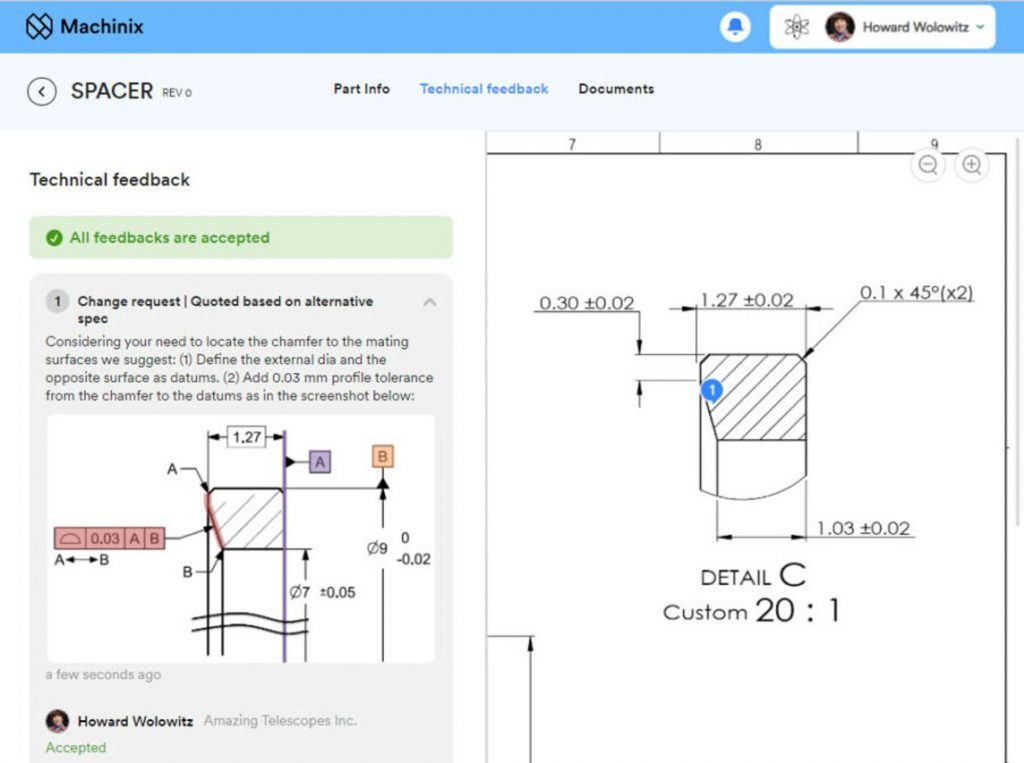
Screenshot showing Mahcinix digital technical feedback feature

Conclusion

GD&T serves as a critical communication tool in the world of precision parts, seamlessly transferring design intent from the engineer’s mind to the production floor and quality control. By clearly defining tolerances and features, GD&T significantly reduces the risk of quality issues and ensures the part’s functionality.

If you’re looking for expert guidance on implementing GD&T into your precision manufacturing processes – create a quote request and upload your drawings today. Our technical solutions engineers will review and give you valuable feedback within 48 hrs.


The following tip was written in cooperation with TES-TECH. Our technical solution engineers are constantly learning and enriching their knowledge, one way to do that is by attending TES-TEC GD&T technical courses and learn more from Gili Omri and the team.

The Ultimate Guide to Optomechanical Parts

Optomechanical parts are the unsung heroes of optical systems, ensuring precise alignment, stability, and protection for delicate components like lenses, mirrors, and detectors. From the housing that shields a laser from dust to the tiny screw that fine-tunes a microscope’s focus, each part plays a critical role in achieving the desired optical performance. In this guide, we’ll explore the diverse world of optomechanical components, providing explanations, images, and design tips to help you understand their functions and importance.

Optical Housing

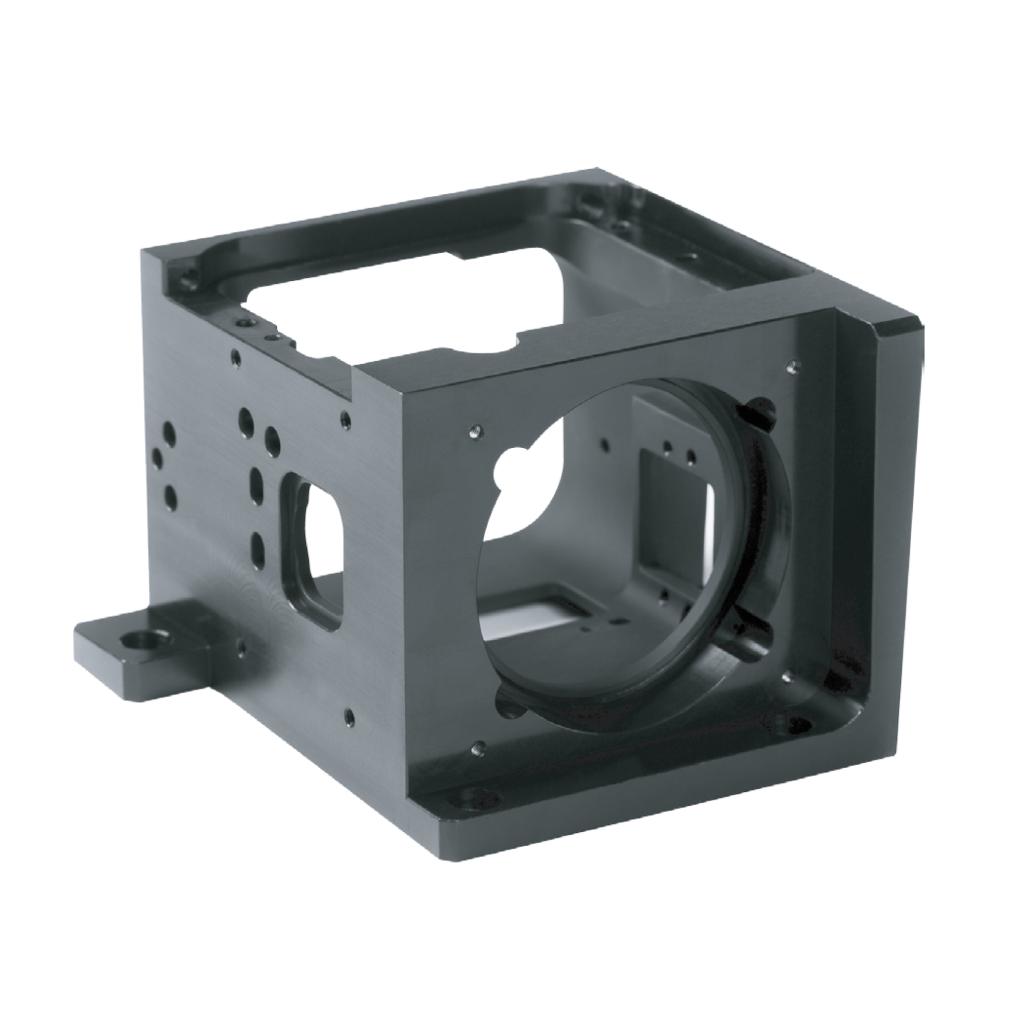
Optical Housings are precision-engineered enclosures that securely hold and protect optical components like lenses and mirrors. They maintain exact alignment and safeguard optics from environmental factors such as dust, moisture, and mechanical stress. High precision is critical, as even the slightest misalignment can affect the optical system’s performance. These housings are typically made from durable materials like aluminum or stainless steel to ensure long-term stability and reliability in sensitive applications like cameras, lasers, and scientific instruments.

Custom optical housing, AL6061-T651 with black anodize finish

Spectrometer Housing

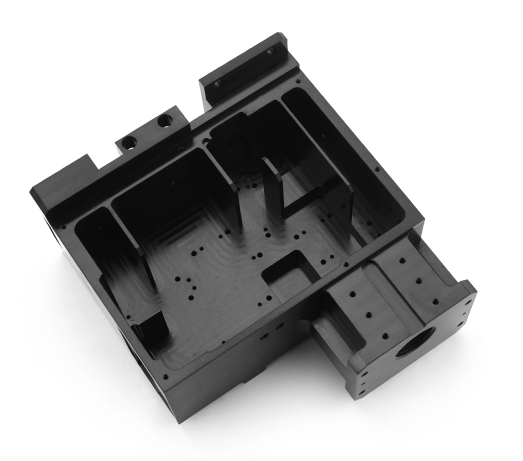
A spectrometer housing is a critical component in optical systems, safeguarding delicate spectrometer parts like diffraction gratings and detectors. These housings provide a stable, protected environment, shielding the spectrometer from dust, moisture, temperature fluctuations, and vibrations that can interfere with accurate measurements. The accuracy of the housing’s machining directly impacts the spectrometer’s performance, ensuring precise alignment and reliable spectral analysis. This specific housing features a sand-blasted matte finish to minimize internal reflections and stray light, further optimizing its performance.

Close-up photo of a custom-machined aluminum spectrometer housing with sand blasted matte finish and black anodize finish
Custom spectrometer housing, AL6061-T651 with internal sand blasting and black anodize finish

Static Lens Mount

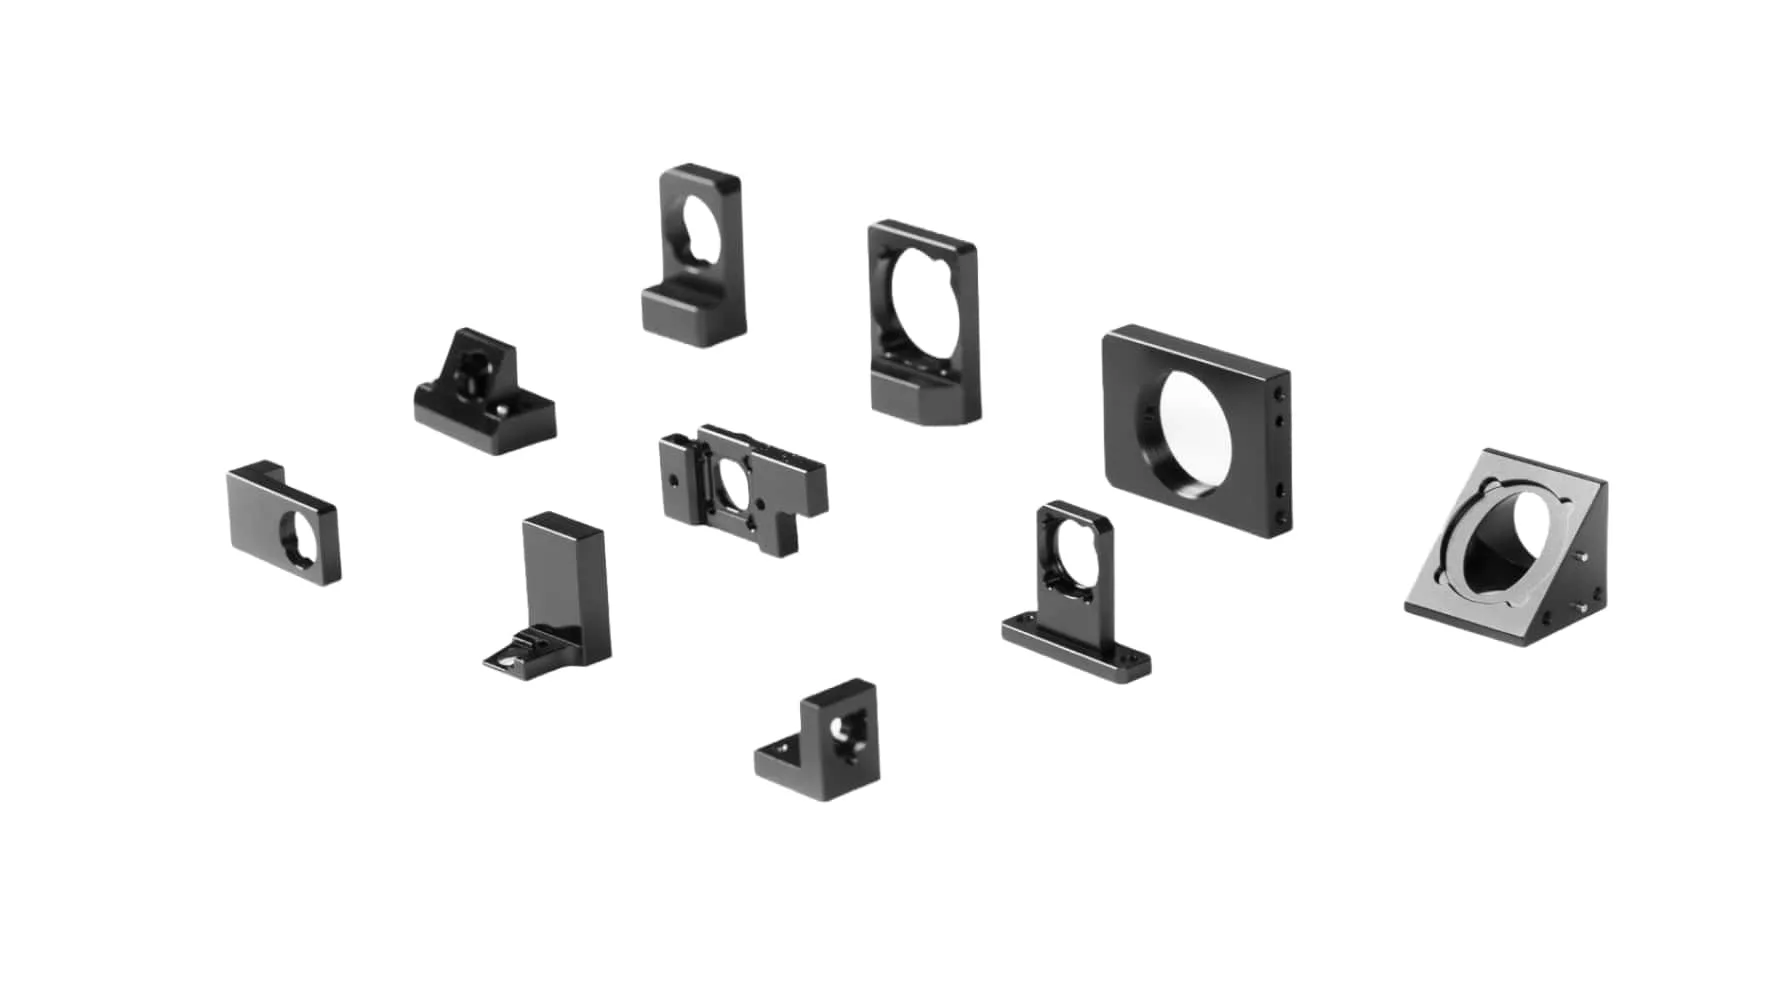
Static lens mount are precision components used to securely hold and align optical lenses in optical applications to direct and route light beams from their source to a target area. They are essential for precise beam alignment in various industries, including research, biomedical, life sciences, astronomy, metrology, and semiconductor manufacturing. These mounts need to be highly precise for accurate positioning on the plate or housing.

A photo of 10 different custom-machined lens mounts and holders made of aluminum with black anodize finish
Static lens mounts, AL6061-T6 with black anodize

Adjustment Screws

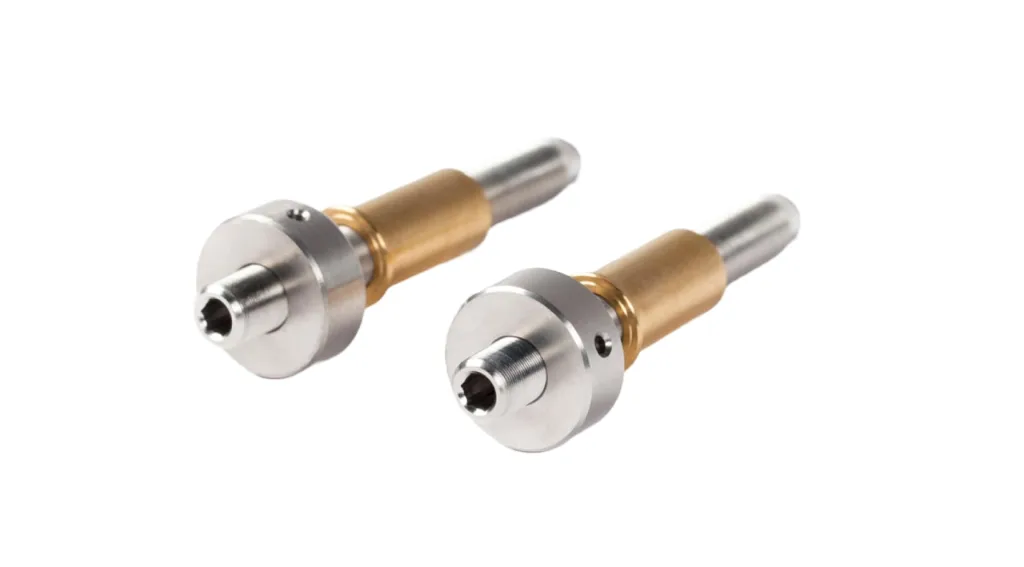
Adjustment screws are essential optomechanical component, providing precise and controlled movement for aligning optical elements with high accuracy. These screws typically feature fine threads, specifically designed for optical adjustments, enabling minute positional changes that are critical for optimizing optical systems. They can be sourced from standard optomechanical component manufacturers like Thorlabs and then modified if necessary, or they can be custom-produced from scratch to meet specific application requirements. Often crafted from durable stainless steel with brass sleeves, these adjustment screws offer a balance of strength, stability, and smooth movement, ensuring long-lasting performance and reliable optical alignment in demanding applications.

Close-up photo of an adjustment screw made of stainless steel and brass sleave
Modified Thorlabs adjustment screw, 303 stainless steel with 510 Phosphor Bronze bushing

Base Plates

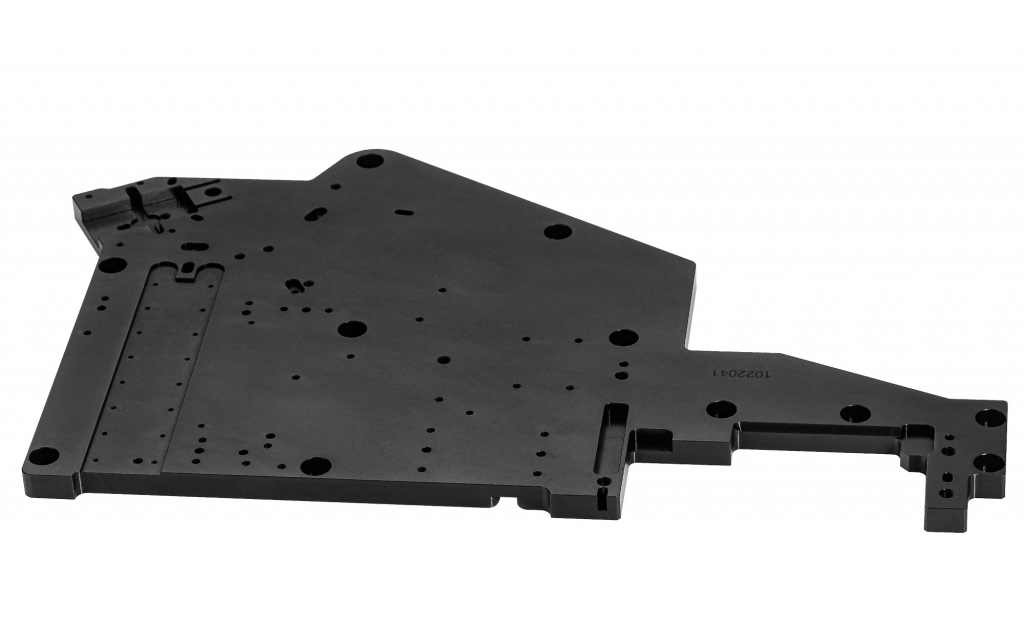
Custom optical systems base plates are the foundation upon which precision optical systems are built. These plates, typically crafted from aluminum or aluminum-based alloys like C250 or ACP5080, provide a stable and reliable platform for mounting various optomechanical parts. Dimensional stability is paramount, as even slight variations can impact the accuracy and performance of the optical system. To ensure this stability, the material is often stress-relieved to minimize dimensional changes over time. The flatness of the mounting surfaces and the precision location of the pins or pin holes on the plate are critical, directly influencing the precise positioning and alignment of optical components, and therefore the overall performance and reliability of the optical system.

Base plate, Aluminum C250 with black anodize

Retainers

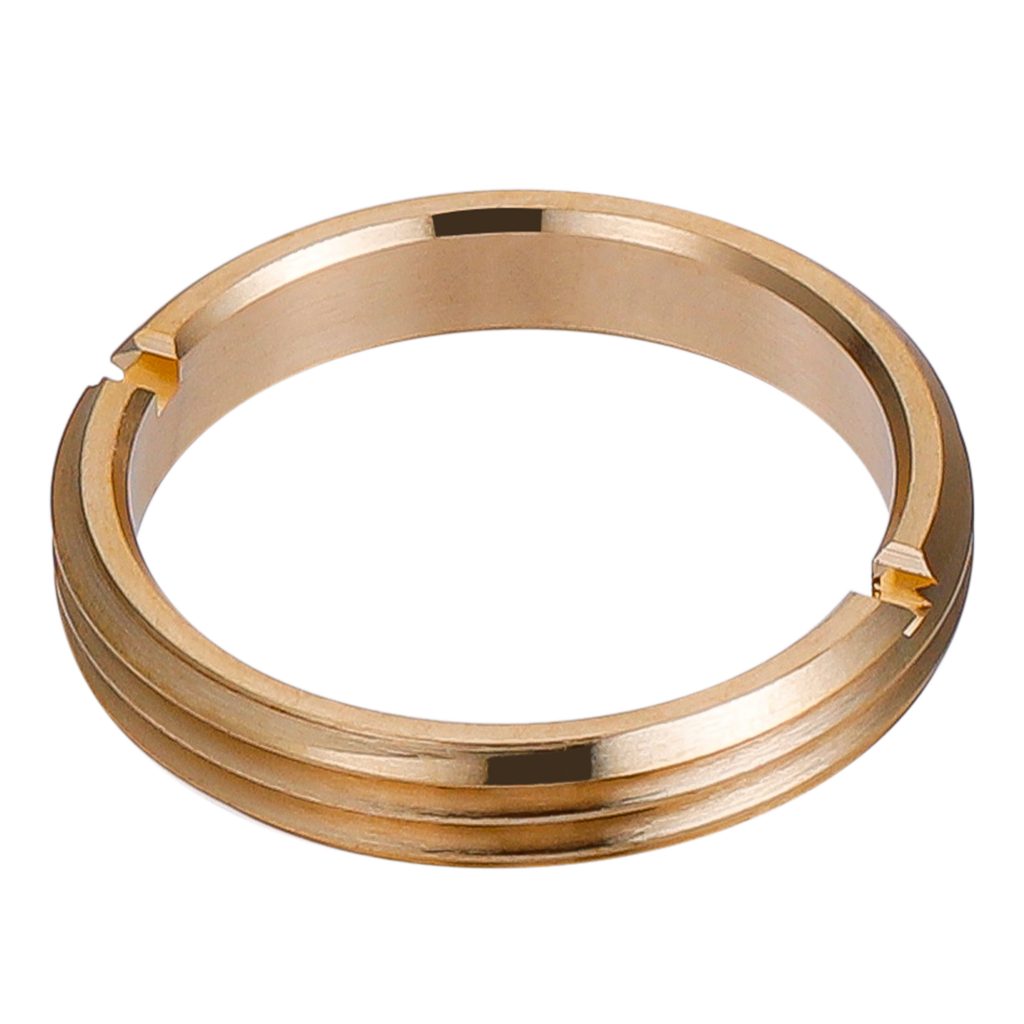
Retainers are essential in Optomechanics for securely holding and precisely positioning optical components like lenses and mirrors within their mounts. This secure hold prevents movement or misalignment that could degrade the optical system’s performance. Commonly used in optical barrels, condenser housings, and other assemblies, retainers usually “push” the optical element against a precisely machined surface within an accurate diameter, which together determine the element’s position relative to other optical components. Brass is often chosen for retainers due to its combination of strength and slight flexibility. This allows for minute adjustments during temperature changes, preventing stress on the delicate optic, which is crucial for maintaining optimal performance and long-term reliability.

Threaded retainer, C36000

Practical tips:

  1. GD&T Tip for retainer design: Turning Plus/Minus To Profile Tolerance

Filter Wheels

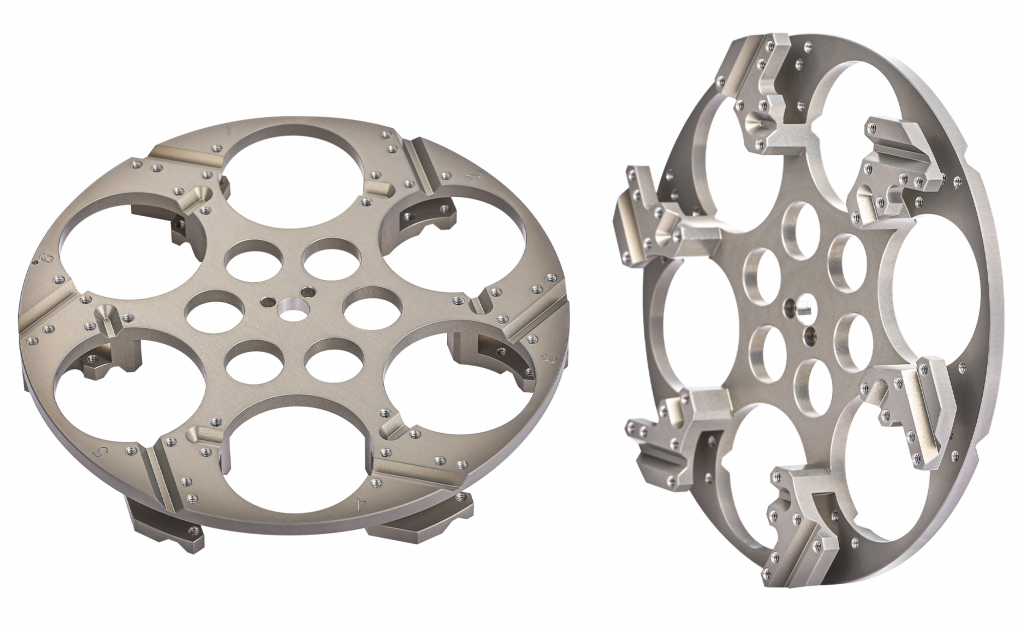
Filter wheels are mechanical devices used to hold and rotate optical filters in front of light sources or detectors. They are commonly used in imaging and spectroscopy systems to switch between different filters, allowing the user to selectively transmit specific wavelengths of light. Filter wheels are often motorized, enabling precise and automated control over which filter is placed in the optical path. They are critical in applications like fluorescence microscopy, astronomy and machine vision, where different wavelengths or colors need to be isolated for analysis or imaging.

Filter wheel, AL6061-T651, Clear head anodize with masked threads

Condenser housing

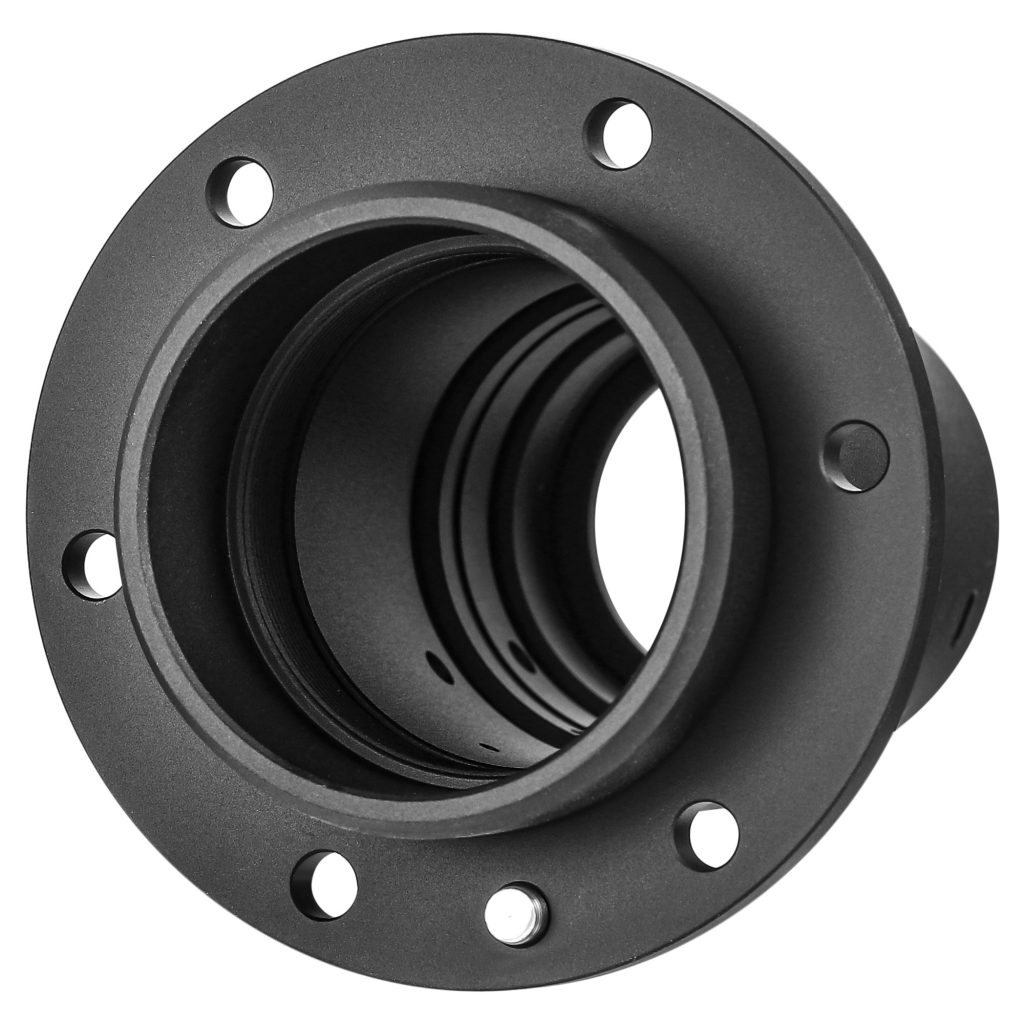
A condenser housing is a crucial component in optical systems, specifically designed to house and protect the condenser lens. This housing ensures the condenser lens is held securely in the correct position and alignment, which is vital for controlling and concentrating light onto the object being viewed. The precise positioning of the condenser lens within its housing directly influences the quality and uniformity of illumination, affecting the overall performance of the optical system.

Condenser housing, AL6061-T651, Sandblasting, in-organic anodize coating